
Transpose Any Audio Easily in Logic Pro X 10.3.2

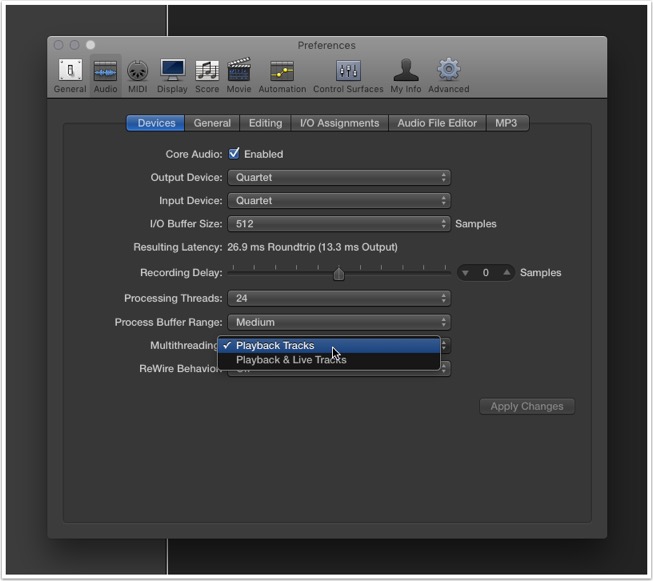
Logic Pro 10.2.1 Multithreading Option Causes Overloads
Logic Pro X: Track or Region Based Automation?
Logic Pro X 10.1 has a new button for selecting track-based or region-based automation. But which one should you be using and why? Darren Burgos tells you the way it is and shares tips along the way.
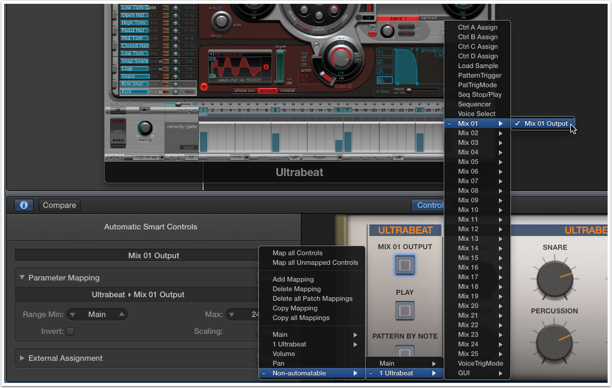
Making Multi-Out Setup Easy in Logic Pro's Ultrabeat
Even if you know how to create a multi-output setup for Logic Pro X's Ultrabeat, you should read this excellent tutorial by Darren Burgos with some advanced tips on how to make multi-output easy!
blog comments powered by Disqus
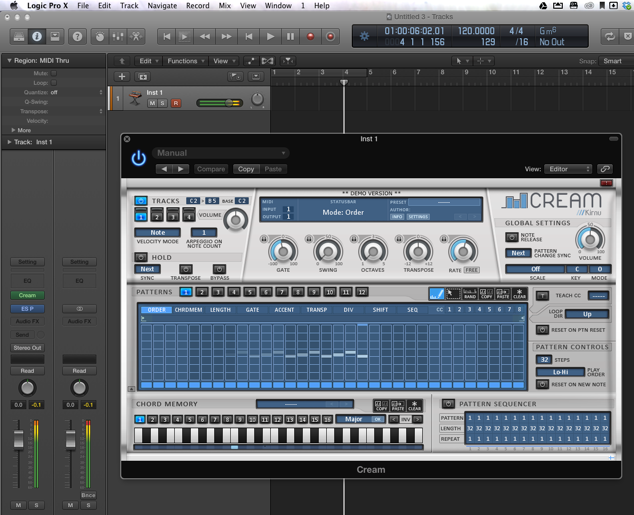
Kirnu Cream as a Logic Pro X MIDI FX
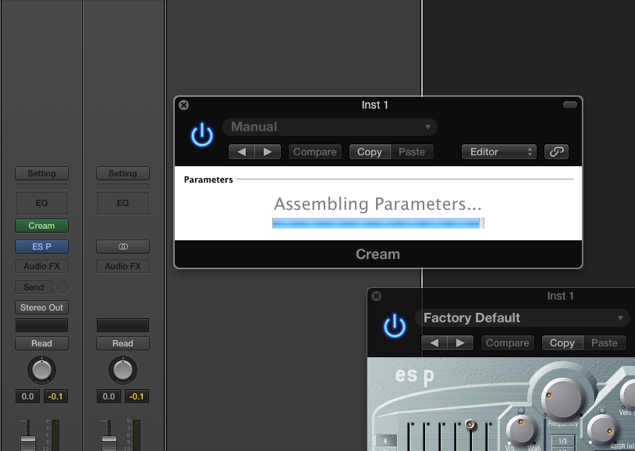
After a restart of Logic the plug-in comes up fine and can be instantiated via the MIDI FX menu on every software instrument channel. Check it out if you're running Logic Pro X.
Kirnu Cream Site
blog comments powered by Disqus
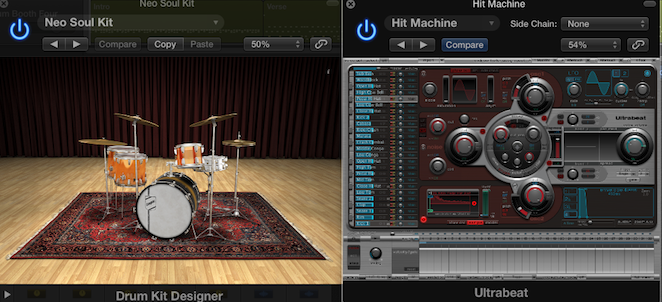
5 Steps for Taking Logic Pro X’s Drummer Beats into Ultrabeat
Jay Asher is here to show how to take Logic Pro X's killer feature, Drummer, to the next level. Interestingly, Jay takes Drummer patterns into Ultrabeat to seek more R&B and Pop beat options.
blog comments powered by Disqus
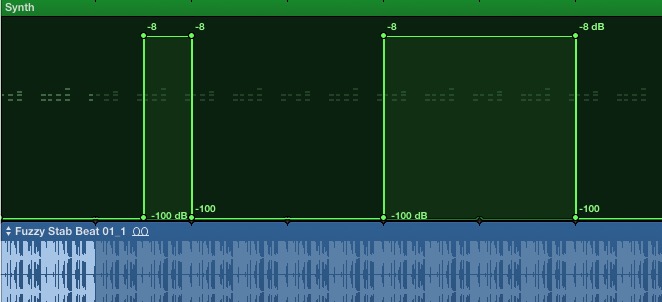
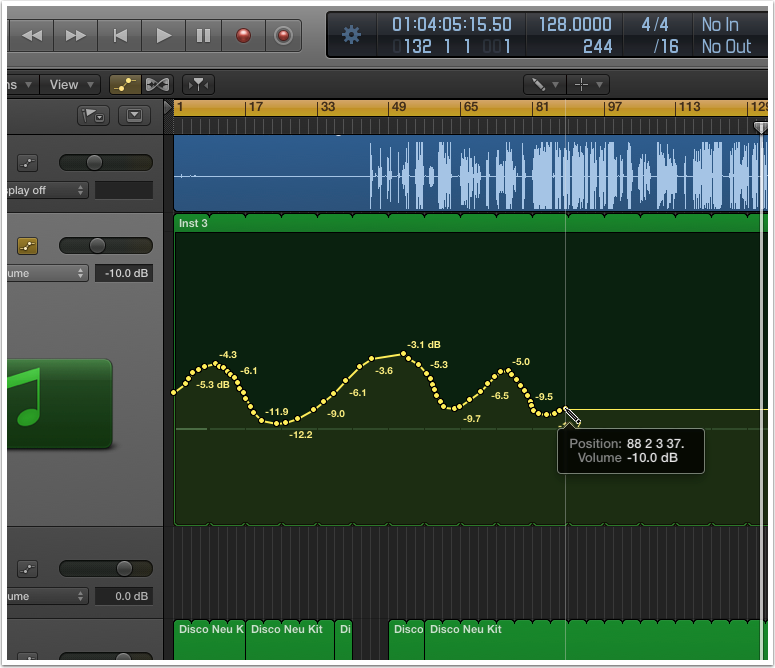
Drawing Automation in Logic Pro X
Tips: the slower you draw the more individual nodes are created. If you need a straight line hold the SHIFT key down while drawing. Want to quantize the data? Open the Event Tab in the List Editors window. Switch to the Automation Select Tool and highlight all the data you want quantized. Go back to the Event Editor window and choose a quantization value!
blog comments powered by Disqus
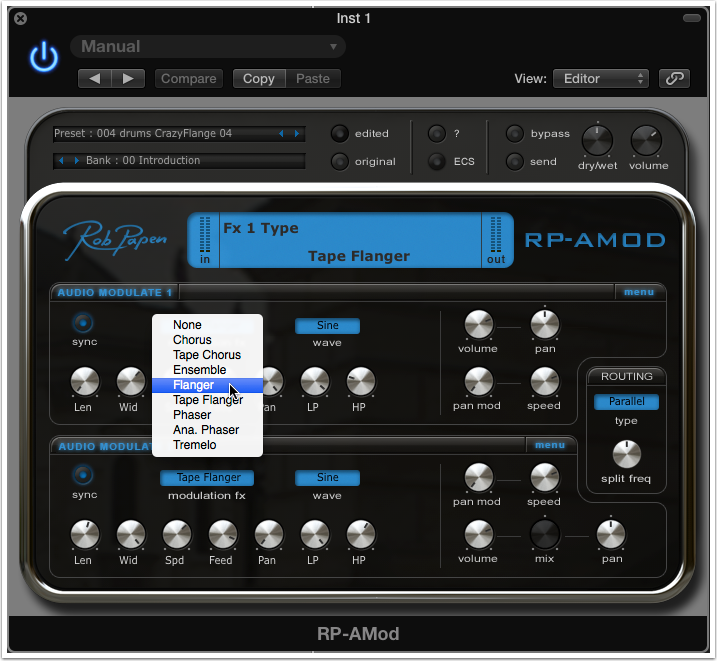
Free plug-in for Rob Papen Customers
blog comments powered by Disqus
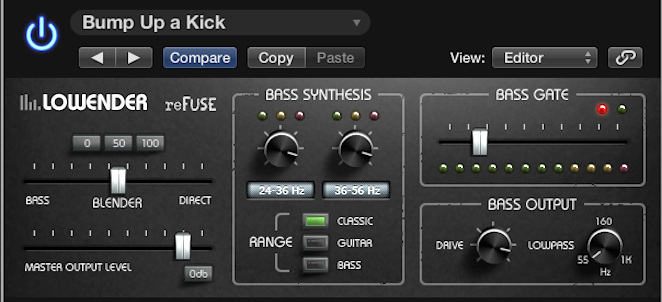
3 Low Frequency Enhancers to Make Your Tracks Rumble
Sometimes, especially when producing EDM, you just want to add more bass to your tracks. Darren Burgos gets the low-down on 3 capable low frequency enhancer plug-ins, but which one wins?
blog comments powered by Disqus
Quick and Easy Gated Stutters in Logic Pro X
Want to create stunning st-st-stutters in your tracks using Logic Pro X? Well, you're in luck: Darren Burgos reveals his production techniques for great gated stutters.
blog comments powered by Disqus
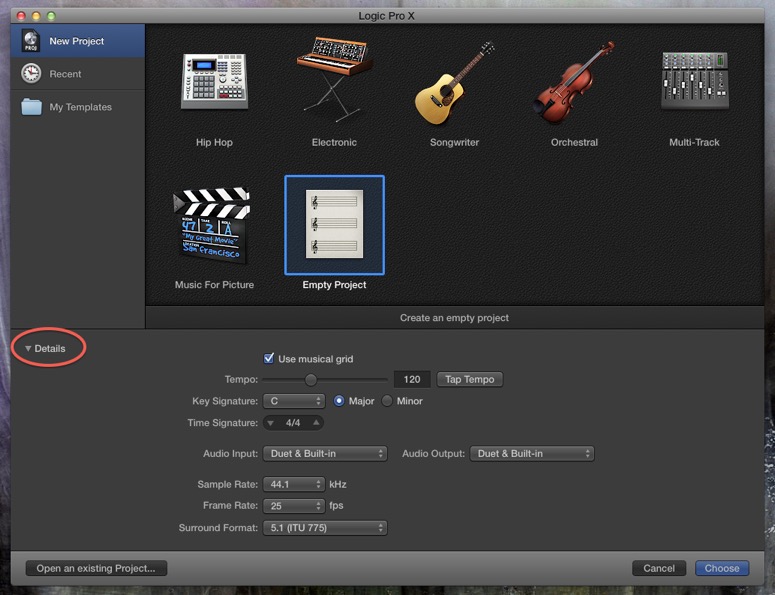
New Project Details Menu
It's pretty easy to miss, but the new "details" drop down menu in Logic Pro X is packed with great new stuff. You expand this menu at the bottom of the New Project menu. When you do, it gives you a multitude of choices all before ever launching the project. Once expanded you have the option of setting Logic's tempo by hand, or with a new tap tempo for setting the BPM on the fly. This is great while practicing with other players (especially if you'll be the virtual drummer). You can also set the Key, Signature, choose your audio inputs and outputs, the project's sample rate, frame rate, and even the surround format.
blog comments powered by Disqus
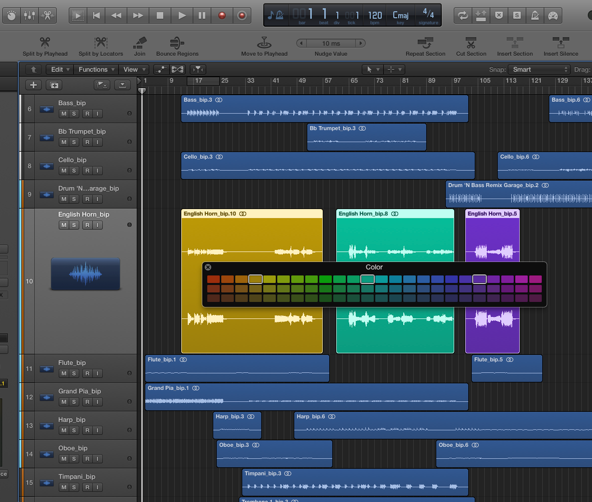
Logic Pro X: A Smarter Color Palette
Who'd have thought there was room to improve the Color Palette!? Even though you can no longer choose custom colors, Apple has made it considerably smarter. Very often you'll have different colored regions on a track after picking various shades from Logic's Color Palette. In Logic 9 if you wanted to select the same shade, it was either a test of your ability to distinguish subtle color variances, or you simply remembered where the color was on the palette! In Logic Pro X, when you click a track with various colored regions (with the the Color Palette open) it shows you all the region colors used on the specific track with a white highlight. You can also click any region, or shift click regions on other tracks to display the colors. No more guess work!
blog comments powered by Disqus
Logic Pro X: Snapping in an Audio Take Folder
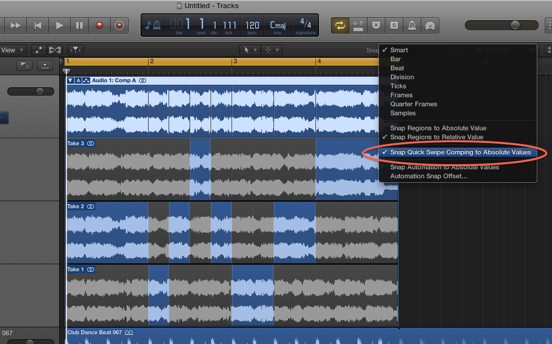
For nearly 4 years I've been waiting for this feature! Audio Take folders in Logic Pro X can finally snap to the beat. In Logic 9, lot's of dance artists pack take folders full of audio loops, then Quick-Swipe across them to grab element chucks from the different loops for a stop-chopped electro house technique. I have an article I wrote for macProVideo on doing this very thing. The only problem with this technique up until now, was that when you went to swipe across the various takes, your swipes were not quantized/snapped to a beat. You had to watch the time bar ruler at the top of the arrange window to make sure your swipes were at least close to snapped position. Now in Logic Pro X you can enable "Snap Quick Swipe Comping to Absolute Values" from the Snap menu. This literally snaps your swipes to beat!
Thanks for reading …keep an eye out for more Logic Pro X tips.
blog comments powered by Disqus
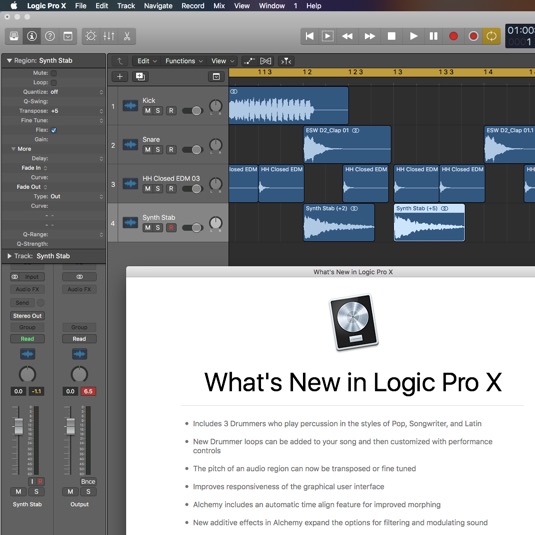
Logic Pro X is HERE!
blog comments powered by Disqus
Looping Cut Up Regions in the Arrange Window
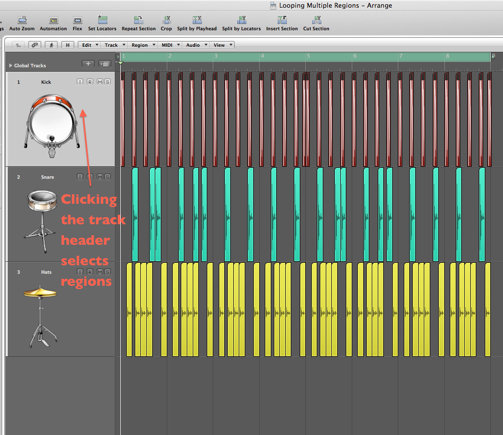
When you edit your drums in the Arrange window as audio, it’s common to have individual drum sounds like isolated kicks, snares, hats and more. This is a great way to edit your drum parts, but what happens when you’d like to loop the section you built? First you have to select the regions you want, and copy them, but pasting is not always easy because the snare for example is normally not on the start of a bar. You have to zoom in far enough so you know the copied snares you're about to paste are in the right position.
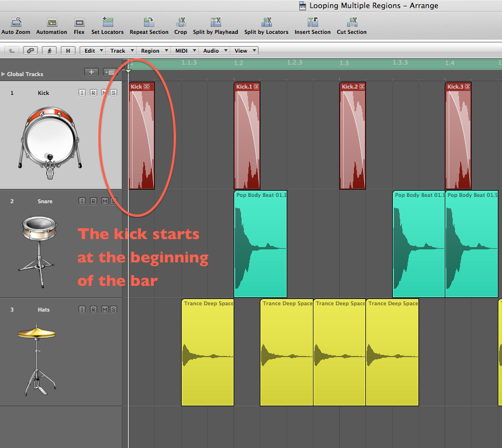
Let’s make looping cut up audio drums a bit easier by converting them to perfect neat 8 bar (or however long your part is) regions. First let’s do the kicks. These are easy for me, because they start at the beginning of a bar, and end perfectly on one too.

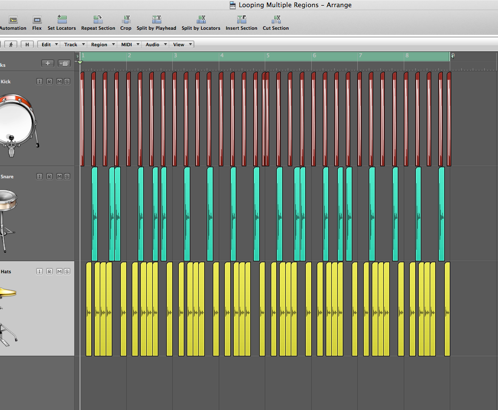
I’ll first click the track header for the kick. When I do this, all the regions on that specific track get’s selected, or if there’s a cycle enabled (as there is in the example image below), it will select only the regions inside the cycle area.
Once they’re selected, use key command ( Control • = ) to merge all the selected regions into one new region. A window will appear reminding you that if the regions you’d like to merge were not originally contiguous, a new region will be created. You want this, so select “Create.” The way I remember this one is I think; multiple regions added together equals one new region.

Now the snare and hats are a bit trickier. The snare for example doesn’t start or end at the beginning/end of a bar. If we simply used our ( Control • = ) command to merge all the snares, the resulting loop will be off, since it won’t be a perfect 8 bar block. Let’s fix this problem.
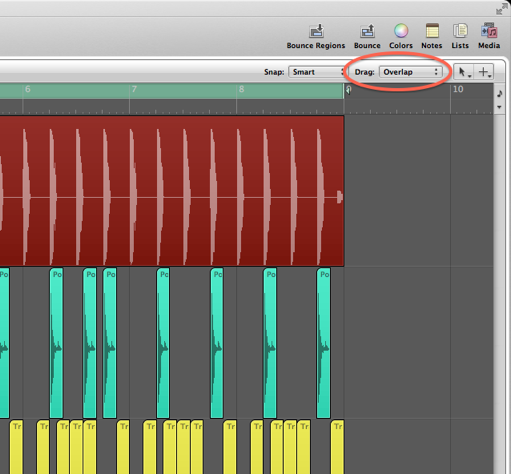
First, make sure “Drag” is set to “Overlap.”
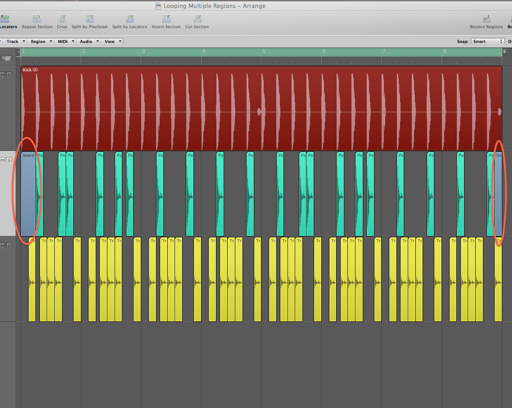
I’ll point to the beginning bar on the snare track and right/(control) click, then I’ll select “Create Empty MIDI Region.” Now I’ll move the timeline to the second beat of the bar, and use key command ( Command • ] ). This is a great command that adjusts the end of a region to the timeline position. You may have guessed that the ( [ ) adjusts the start of the region. Now I’ll do the end. I’ll just option click and drag the region I just made to then end, and adjust it’s end so it’s just a small sliver that stops exactly at the end of bar 8. Here’s how it should look...
Now I’ll select all the regions and merge them with the same technique I used on the kick above. I’ll do the hat in the same way I did the snare. Now I simply press “L” on all three regions to keep the beat looping!
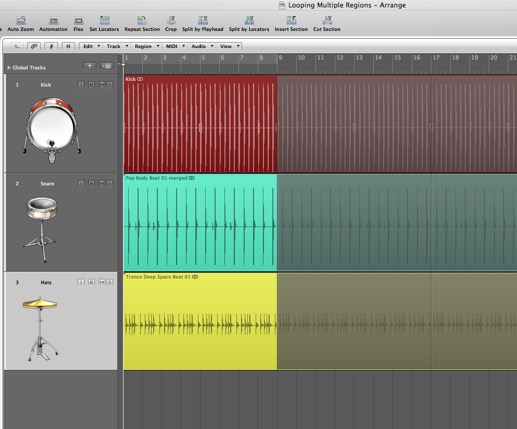
Hope you enjoyed the tip!
blog comments powered by Disqus
Edit different instruments in the same Piano Roll window
Logic Pro Beat Production Tips 1
blog comments powered by Disqus
Step Enter Notes Using Your MIDI Controller
In this tip, I'll show you how to enter notes directly into the Piano Roll window with your MIDI keyboard controller. We'll also set up some great unassigned key commands that will help you along the way.
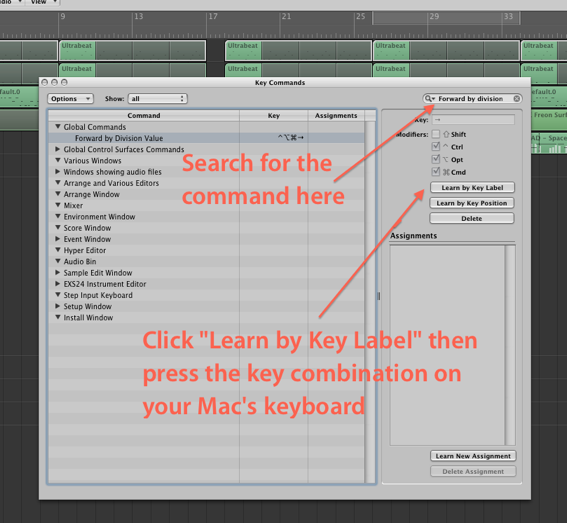
First, open the Key Commands Window (Option • K) and set up these specific key combinations to the following commands. These are all unassigned commands, and the key combinations I chose should all be unused also (If you're using Logic's default commands):
Search for: "Forward by Division"
Click the Learn by Key Label button
Then press (Control • Option • Command • Right Arrow)
Now search for and set these three additional key commands:
Seach for: "Rewind by Division"
Click the Learn by Key Label button
Then press (Control • Option • Command • Left Arrow)
Search for: "Set Next Higher Division"
Click the Learn by Key Label button
Then press (Shift • Option • =)
Think of this one as the + symbol since it shares the same key
Search for: "Set Next Lower Division"
Click the Learn by Key Label button
Then press (Shift • Option • -)
Create an empty region, then double click it to open the Piano Roll. Make sure the time line is at the start of the region (Use the < or > keys to move the timeline bar by bar). Click the IN button at the top of the region and play a chord on your MIDI keyboard. The notes are directly added to the region! 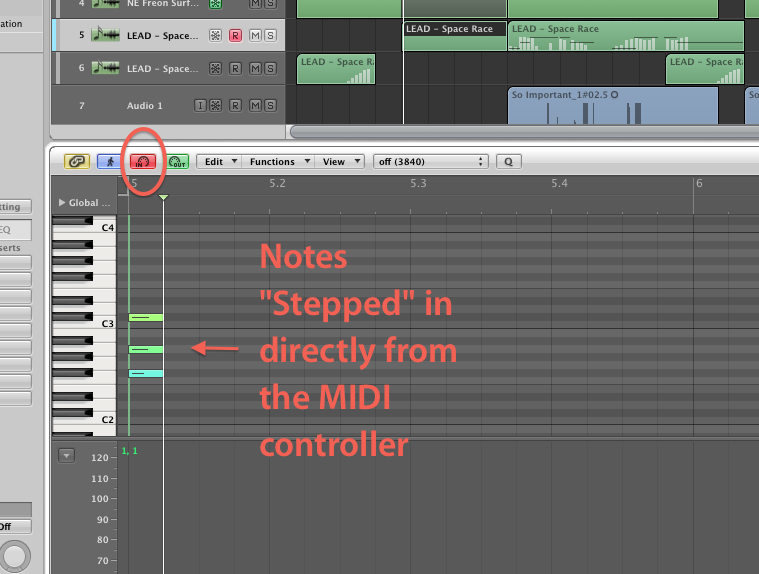
The length of the note is set by whatever division value you have set in the Transport (directly below the time signature), or you can pre-define the note value by opening the "Step Input Keyboard" from Logic's Options menu.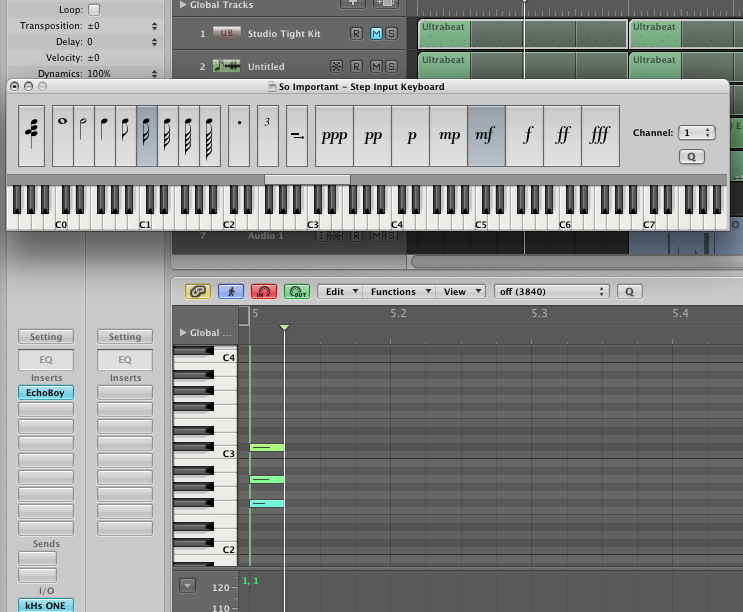
Now depending on the current division setting, the timeline moves to the next division value. This is not always where you want it to be, especially if you want gaps or rests between the notes. Try the Forward/Rewind by division commands you just set. It pushes the timeline forward/back by the set division so you can enter the next note(s) where you wish. If the division is not what you want, then use the other cool commands you just set "Set Next Higher/Lower Division."
If you select the notes you just entered, you can use Option • Left/Right Arrow to move them around by the Division value, and if you use Shift • Option • Left/Right Arrow while they're selected, you can lengthen them by the Division value!
Hope you find this valuable! Till next time.
blog comments powered by Disqus
Creating MIDI Strums and Flam
Have you ever tried to make strums from chords in Logic? It’s a major pain! You have to click each individual note in the Piano Roll, and move it forward or back in time. In this tip, I’ll show you how to use the Region Parameters window to easily make MIDI Strums.
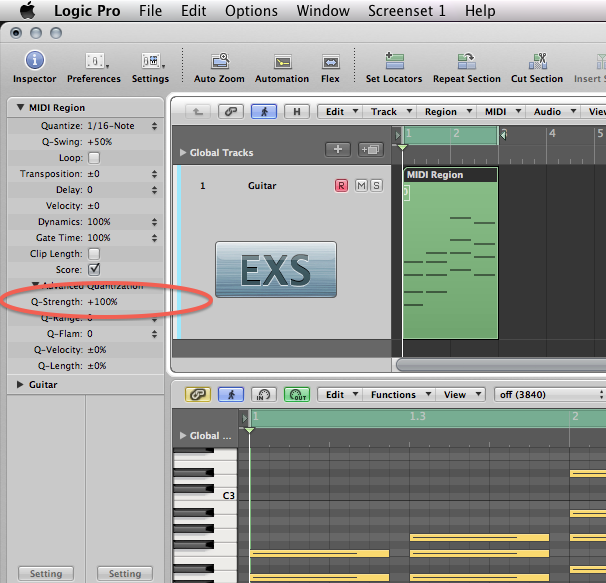
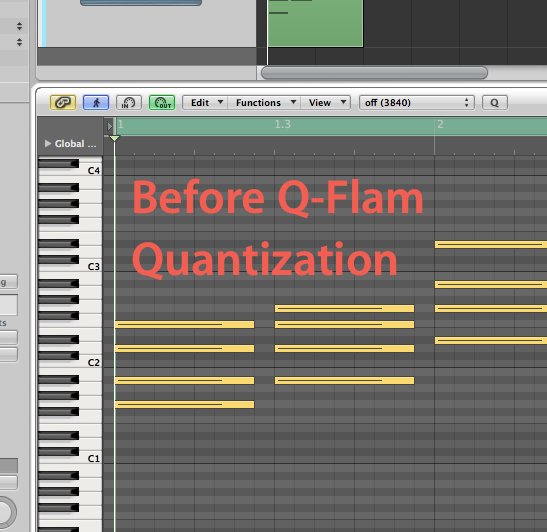
We’ll start by quantizing some chords. Select the region, then from the Region parameters window (at the top of Logic’s inspector) choose 16-Note as your quantization setting. For the strum to work, you must select a quantization value here…

If you’re one of those “I hate quantization” people, don’t worry, you can loosen the quantization up by clicking the Advanced Quantization triangle, and selecting a value below 100% under Q-Strength. (See image below)
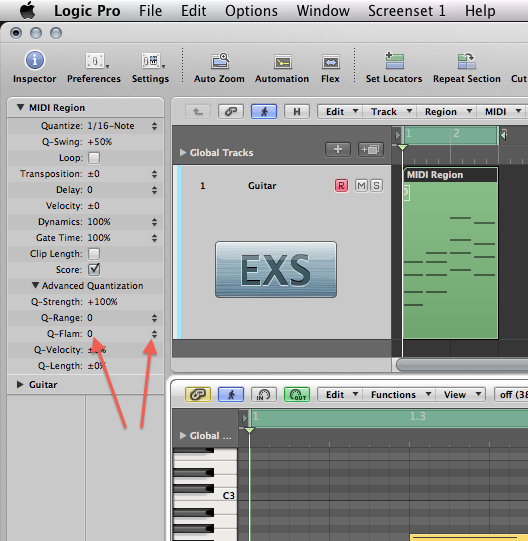
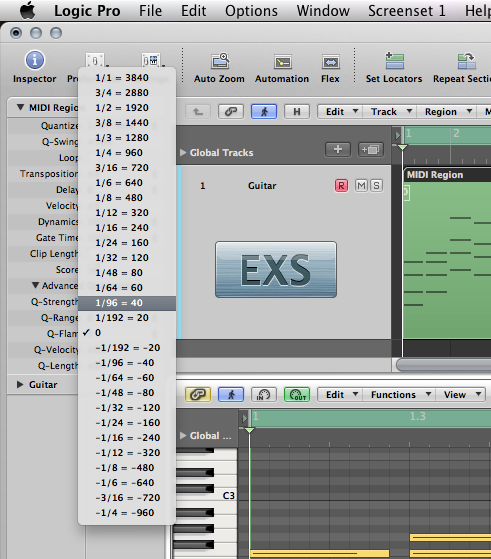
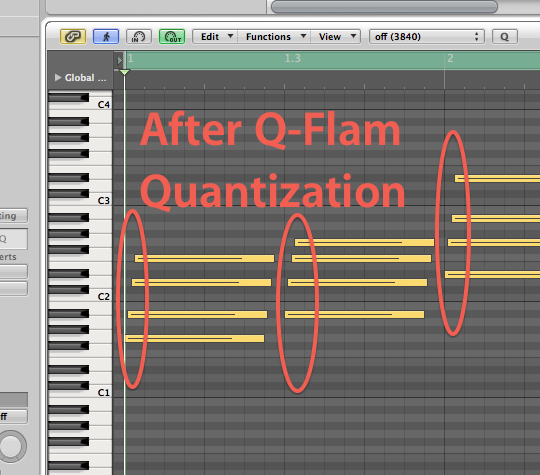
Now let’s make the strum/flam. From the Q-Flam menu, either click/hold and move up/down directly to the right of the word Q-Flam, or select a note length value from the menu with the up/down arrows farther to the right. I’m going to select 1/96 with a positive value (above the zero position). If I chose a negative value, the top note of the chord would have started first.
Hope this helps you out. Till next time!
blog comments powered by Disqus
Compressor's Extended Parameters
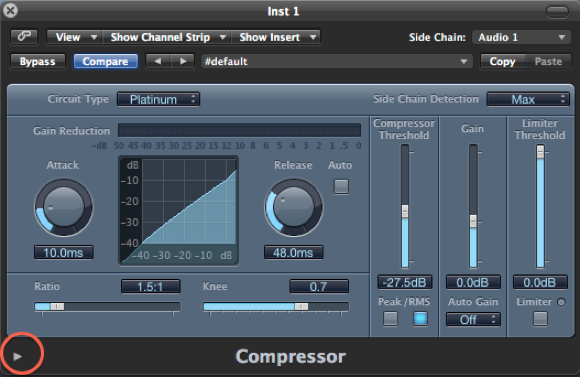
Logic's built in compressor has some cool hidden features. When you click on the small arrow on the bottom, it opens to reveal Compressor's extended parameters...
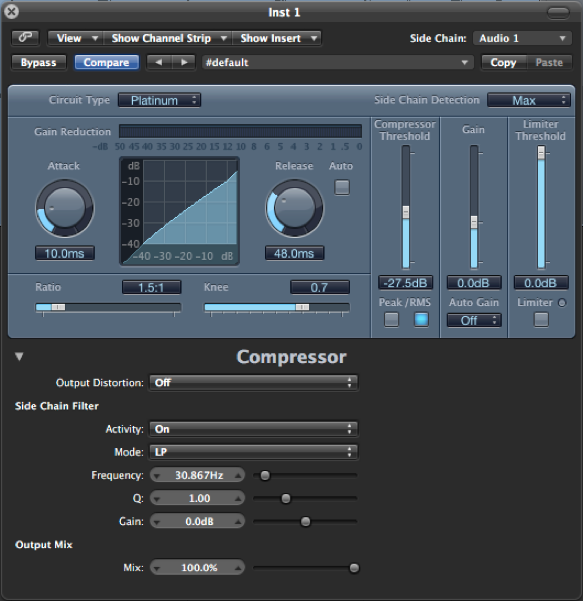
First in the list is "Output Distortion." Since Logic uses 32-bit floating point for audio, the volume ceiling is so high, that it's basically unreachable. Nothing can really distort until the signal reaches your main outputs. This parameter puts a "false ceiling" on the output, so Compressor acts more like a physical piece of gear being driven to capacity. Try experimenting with the various settings (soft, hard, and clip) …also make sure the compressor's gain is above 0 dB or no output distortion will be heard.
Next is the Side Chain Filter. Have you ever wanted to use a kick from an audio drum loop as a side chain source? Normally, if you choose an audio loop as the source, the entire loop (and all it's content) triggers the side chain compression (the kick, hats, snare, toms …everything). The 5 parameters in the Side Chain Filter area, literally let you "filter" out sounds you don't want triggering the compressor. For example, if you only want the kick to act as the side chain source, you can choose LP (Low Pass) from the Mode drop down menu. The different parameters are as follows...
Activity. This has three positions …OFF, Listen, and ON. When in the "Listen" position, you can solo the track and actually hear the side chain source feeding through for perfecting it (with the other four parameters below it). After you've perfected the source with the Listen option, you then change to ON so it can start effecting the sound.
Mode. There are five options in the menu. Low Pass, Band Pass, High Pass, Parametric, and High Shelving. These will let you filter out any of the frequencies you don't want triggering the compressor. If your side chain source is a drum loop, you can filter out all the highs with a Low Pass to focus on the kick, or a High Pass to filter out all the lows and use the hats or snare as the side chain source. There's even a Band Pass filter if your want to use mid toned material for your source like vocals.
Frequency, Q, and Gain. These three parameters allow you to fine-tune the side chain sound. After choosing the filter type from the Mode menu above, you can then adjust the frequency, the width of the frequency (Q), and the volume (Gain).
Last in the list is the Mix slider. This is actually very cool. There's a type of compression called "New York" compression. Basically, you mix the dry signal with a compressed version. The standard way to accomplish this, is by using a send. This slider does this for you by mixing in the dry signal (by a percentage).
blog comments powered by Disqus
