
Looping Cut Up Regions in the Arrange Window
When you edit your drums in the Arrange window as audio, it’s common to have individual drum sounds like isolated kicks, snares, hats and more. This is a great way to edit your drum parts, but what happens when you’d like to loop the section you built? First you have to select the regions you want, and copy them, but pasting is not always easy because the snare for example is normally not on the start of a bar. You have to zoom in far enough so you know the copied snares you're about to paste are in the right position.
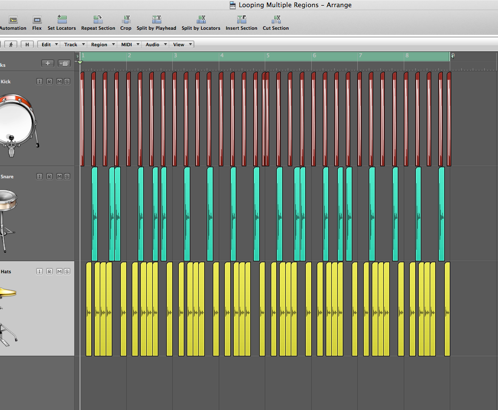
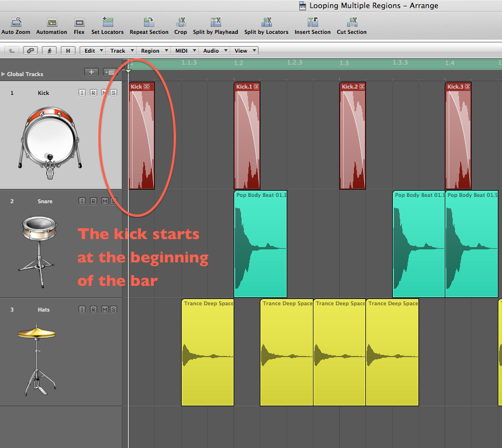
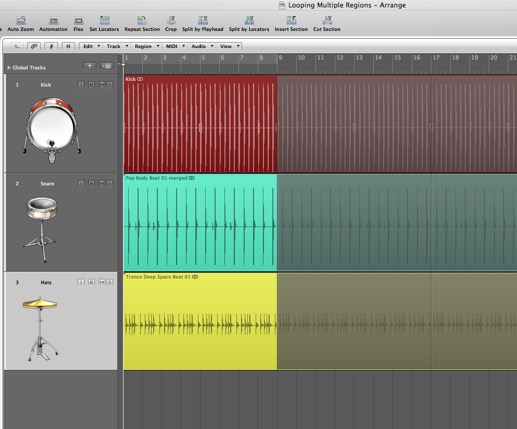
Let’s make looping cut up audio drums a bit easier by converting them to perfect neat 8 bar (or however long your part is) regions. First let’s do the kicks. These are easy for me, because they start at the beginning of a bar, and end perfectly on one too.

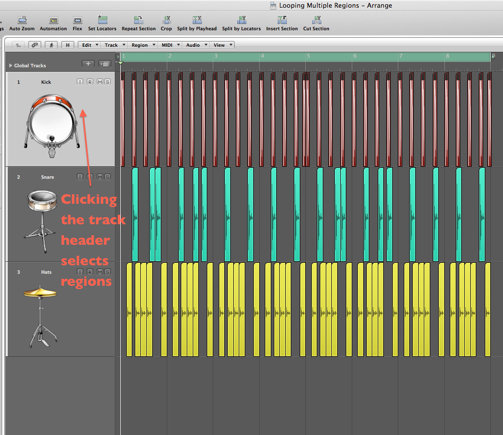
I’ll first click the track header for the kick. When I do this, all the regions on that specific track get’s selected, or if there’s a cycle enabled (as there is in the example image below), it will select only the regions inside the cycle area.
Once they’re selected, use key command ( Control • = ) to merge all the selected regions into one new region. A window will appear reminding you that if the regions you’d like to merge were not originally contiguous, a new region will be created. You want this, so select “Create.” The way I remember this one is I think; multiple regions added together equals one new region.

Now the snare and hats are a bit trickier. The snare for example doesn’t start or end at the beginning/end of a bar. If we simply used our ( Control • = ) command to merge all the snares, the resulting loop will be off, since it won’t be a perfect 8 bar block. Let’s fix this problem.
First, make sure “Drag” is set to “Overlap.”
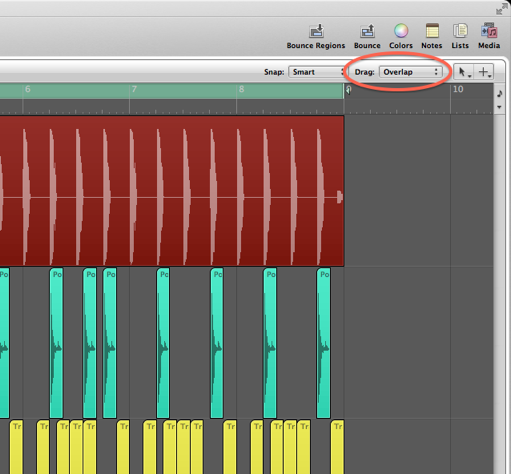
I’ll point to the beginning bar on the snare track and right/(control) click, then I’ll select “Create Empty MIDI Region.” Now I’ll move the timeline to the second beat of the bar, and use key command ( Command • ] ). This is a great command that adjusts the end of a region to the timeline position. You may have guessed that the ( [ ) adjusts the start of the region. Now I’ll do the end. I’ll just option click and drag the region I just made to then end, and adjust it’s end so it’s just a small sliver that stops exactly at the end of bar 8. Here’s how it should look...
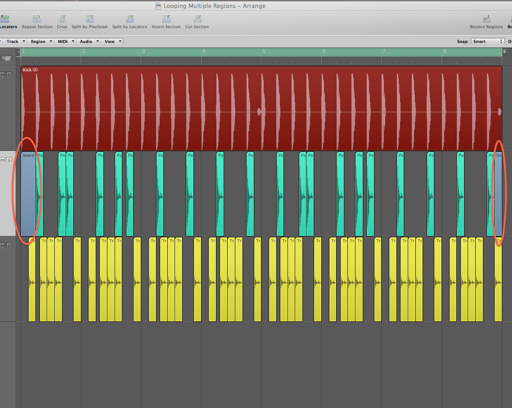
Now I’ll select all the regions and merge them with the same technique I used on the kick above. I’ll do the hat in the same way I did the snare. Now I simply press “L” on all three regions to keep the beat looping!
Hope you enjoyed the tip!
blog comments powered by Disqus
Fine tuning the groove of your tracks in the Region Parameters
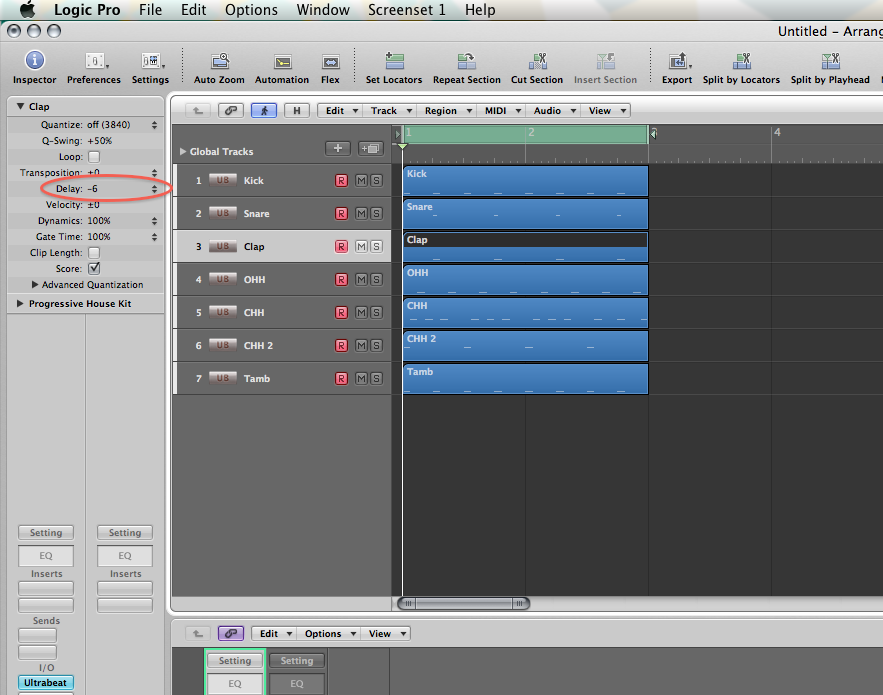
If you like to sequence your individual drum parts like I do, you’ll appreciate this tip! This is great on drum parts, percussion, or nearly anything where a “groove” is necessary. It enables you to move an individual selected region (MIDI or Audio) back/forward a very small amount for perfecting the feel of a part. For example you can nudge a lazy snare sound back in time for a tighter feel, or chill a nervous hi hat part by pushing it forward. For the experimental side in you, you can also move regions by tempo synchronized note values. The “Delay” function in the region info window (in the top drop-down window of the Inspector) allows you to do this without physically moving the region itself. Logic calculates the position and plays the region back or forward in time by the value you specify. This is great when arranging too since the region hasn’t actually moved --(it’s not slightly hanging over a bar position).
First make sure that you actually have a region selected. The image below shows the “clap” region as selected. If you click where the up/down pointing triangles are, you’ll be presented with a list of musical note values. Going above the zero position will play the region forward in time, and below the zero point will play it back in time. Now this works great when you want to experiment with the position a region is played back from (try large note values like minus one 16th note, or plus three 16th notes), but those values are too large, even for the lowest selectable value -of a 192nd note-...we’re simply looking to perfect “the feel.” Click and hold to the left of the up/down triangle selector (this area will sometimes have no value in it at all, mine shows -6 in the image below), then move your mouse up/down to edit the value by sequencer ticks...much better! Try this on your separated drum parts...you’ll be amazed.
blog comments powered by Disqus
