Step Enter Notes Using Your MIDI Controller
In this tip, I'll show you how to enter notes directly into the Piano Roll window with your MIDI keyboard controller. We'll also set up some great unassigned key commands that will help you along the way.
First, open the Key Commands Window (Option • K) and set up these specific key combinations to the following commands. These are all unassigned commands, and the key combinations I chose should all be unused also (If you're using Logic's default commands):
Search for: "Forward by Division"
Click the Learn by Key Label button
Then press (Control • Option • Command • Right Arrow)
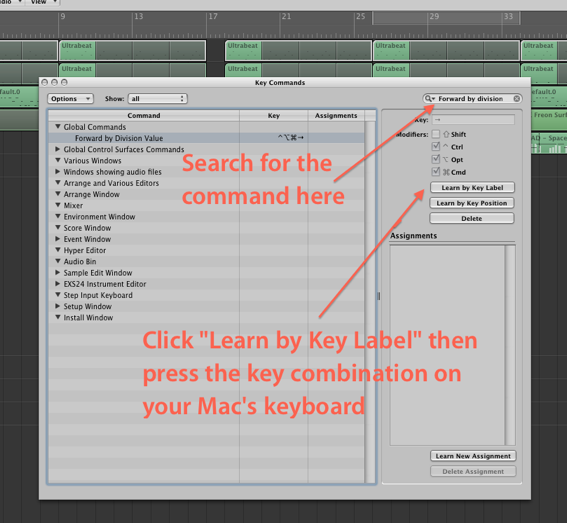
Now search for and set these three additional key commands:
Seach for: "Rewind by Division"
Click the Learn by Key Label button
Then press (Control • Option • Command • Left Arrow)
Search for: "Set Next Higher Division"
Click the Learn by Key Label button
Then press (Shift • Option • =)
Think of this one as the + symbol since it shares the same key
Search for: "Set Next Lower Division"
Click the Learn by Key Label button
Then press (Shift • Option • -)
Create an empty region, then double click it to open the Piano Roll. Make sure the time line is at the start of the region (Use the < or > keys to move the timeline bar by bar). Click the IN button at the top of the region and play a chord on your MIDI keyboard. The notes are directly added to the region! 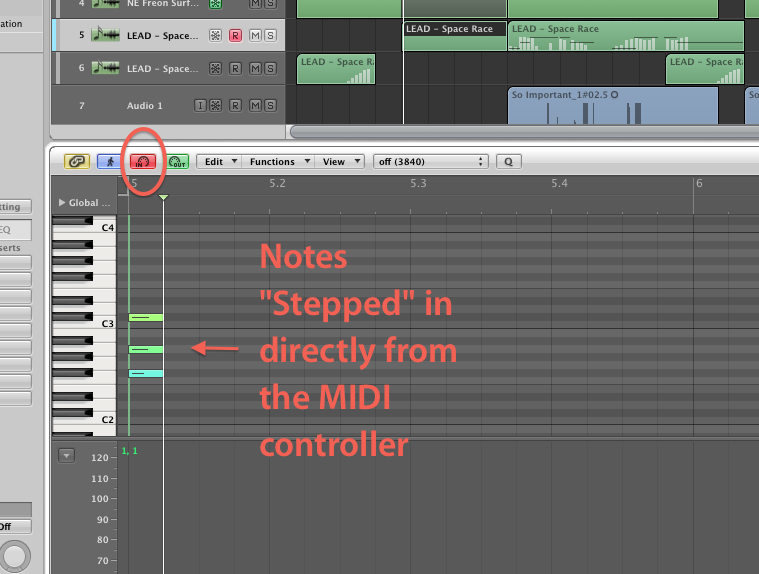
The length of the note is set by whatever division value you have set in the Transport (directly below the time signature), or you can pre-define the note value by opening the "Step Input Keyboard" from Logic's Options menu.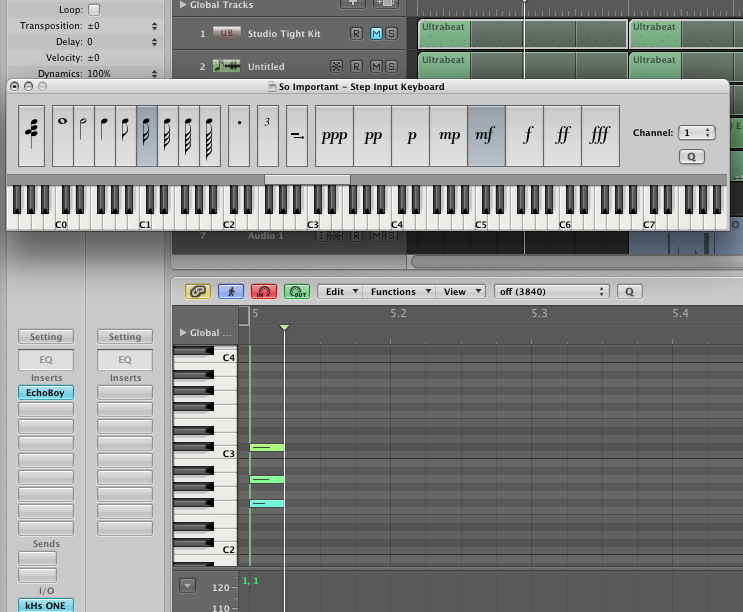
Now depending on the current division setting, the timeline moves to the next division value. This is not always where you want it to be, especially if you want gaps or rests between the notes. Try the Forward/Rewind by division commands you just set. It pushes the timeline forward/back by the set division so you can enter the next note(s) where you wish. If the division is not what you want, then use the other cool commands you just set "Set Next Higher/Lower Division."
If you select the notes you just entered, you can use Option • Left/Right Arrow to move them around by the Division value, and if you use Shift • Option • Left/Right Arrow while they're selected, you can lengthen them by the Division value!
Hope you find this valuable! Till next time.
blog comments powered by Disqus
Creating MIDI Strums and Flam
Have you ever tried to make strums from chords in Logic? It’s a major pain! You have to click each individual note in the Piano Roll, and move it forward or back in time. In this tip, I’ll show you how to use the Region Parameters window to easily make MIDI Strums.
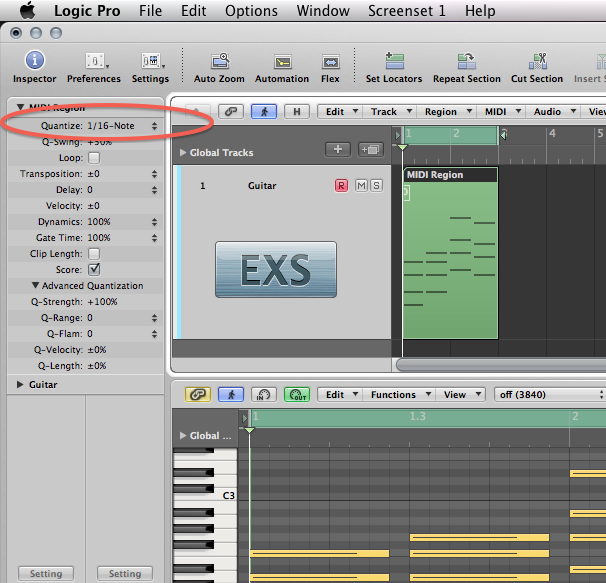
We’ll start by quantizing some chords. Select the region, then from the Region parameters window (at the top of Logic’s inspector) choose 16-Note as your quantization setting. For the strum to work, you must select a quantization value here…
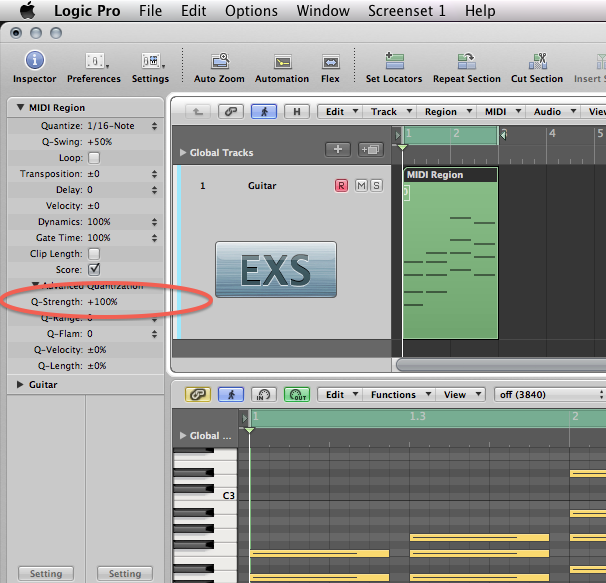
If you’re one of those “I hate quantization” people, don’t worry, you can loosen the quantization up by clicking the Advanced Quantization triangle, and selecting a value below 100% under Q-Strength. (See image below)
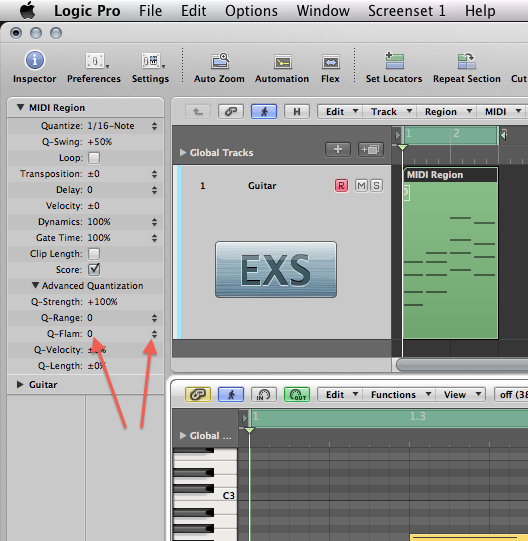
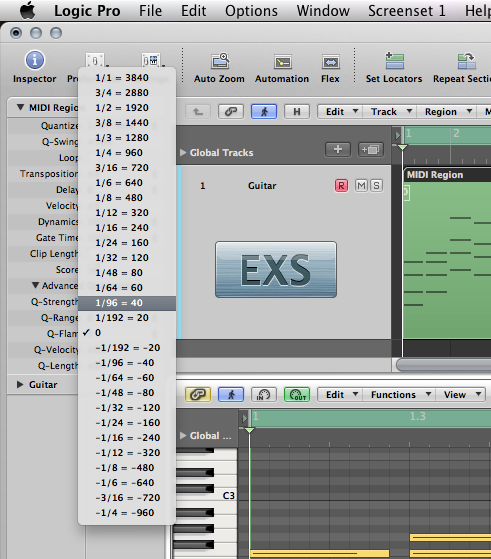
Now let’s make the strum/flam. From the Q-Flam menu, either click/hold and move up/down directly to the right of the word Q-Flam, or select a note length value from the menu with the up/down arrows farther to the right. I’m going to select 1/96 with a positive value (above the zero position). If I chose a negative value, the top note of the chord would have started first.
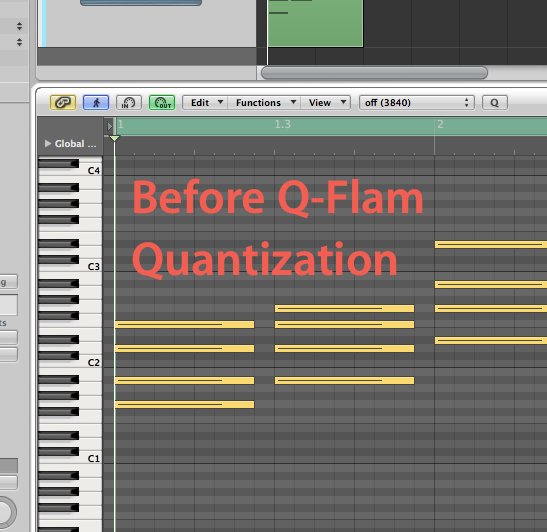
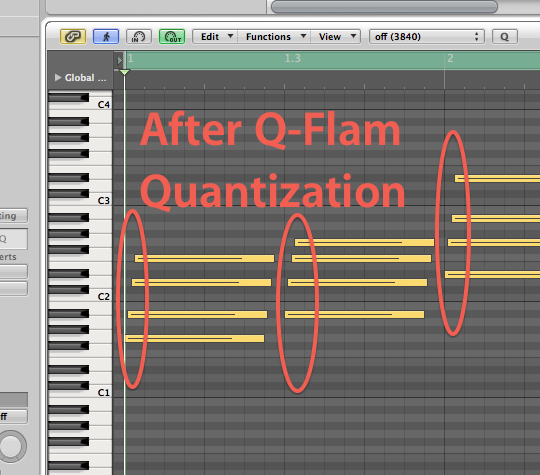
Hope this helps you out. Till next time!
blog comments powered by Disqus
Capture MIDI...even when you're not recording

When playing along to a song in Logic on your MIDI keyboard, have you ever regretted not being in record mode? What if there was a magic button that could capture what you played, even when you weren’t recording? After enabling the “Capture Recording” button, you’ll be able to do this.
First, let’s enable the “Capture Recording” button by pointing to the Transport Bar at the bottom of the screen, then “Control + Click” (right click). (see image below). Click “Customize Transport Bar...” when a list of options appears.
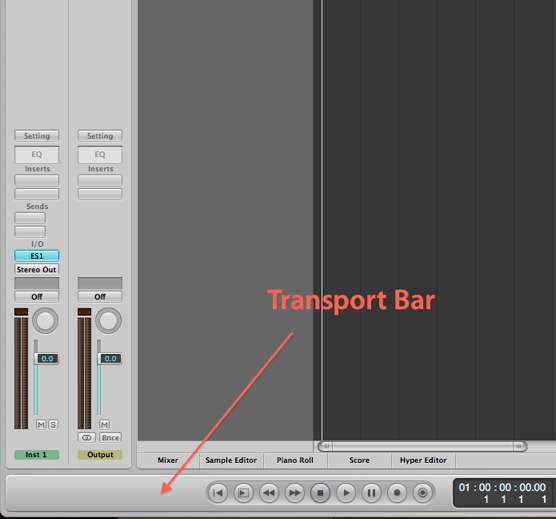
This will open a window with many buttons. (see image below). Click the checkbox for “Capture Recording.” You may want this button to be available in every future project, if so, click the “Save As Default” button before closing the window.
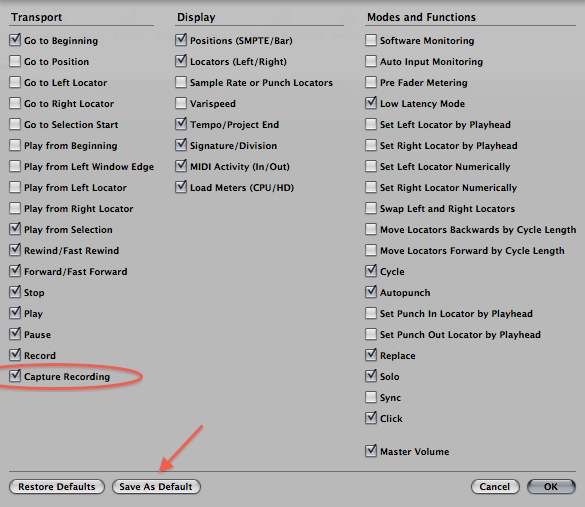
You’ll now have a new button to the right of Logic’s record button (a circle within a circle --- it can be seen in the first image above). Think of it as a regular record button, but this button is pressed AFTER you play.
There are a couple of things to keep in mind though...Logic must be playing. In other words, - you were “playing along” to the song/track. -- Nothing is recorded if Logic was not in playback (the timeline wasn’t moving) -- Even with the drawbacks, this feature is amazingly useful. In most cases I’m playing along with the track I’m making...I’m always confident that whatever I do, can be instantly captured. As soon as I’ve played something worthy of being captured, I stop Logic from playing back with the spacebar, then I immediately click the “Capture Recording” button. Everything I played on the MIDI keyboard -- from the last point Logic with was put into playback -- is captured and placed into the Arrange window on the currently selected track.
Tip: If you press play again before capturing the recording...and then play even a single note, the buffer is reset and you’ll lose the MIDI you intended to capture.
You can also be in cycle mode and click the Capture Recording button! So imagine that you were looping a section of your song to practice with. Every return cycle is recorded, and Logic even pulls them into a “Take Folder” for you. Just like an audio based Take Folder, the region has a small triangle in the top left corner. You can click this to reveal the takes. You can’t however “quick-swipe” as you do on audio, but you can select which take plays back. You can even piece the entire MIDI performance back as if it were recorded linearly. To do this, click the arrow on the RIGHT side of the region, and select “Unpack Take Folder.” This will disperse the MIDI Takes onto tracks where they can now be placed one after the other.
Tip: If you want to put them back together in the exact order, keep in mind that the very bottom region is the first take.
Hope this tip helps!
blog comments powered by Disqus
Snap Flex Mode Transients to Other Transients or MIDI Notes

Flex Mode was introduced in version 9 and allows you to literally play with your audio like putty. You can place a Flex Marker on a transient and move it forward or backward to adjust it’s time --with or without effecting the audio before or after--. You can also quantize audio in much the same way you quantize MIDI regions.
A lesser known function of Logic’s Flex Mode is the ability to “snap” a transient to another audio or MIDi region (for example, an un-quantized MIDI or audio region that has a great groove). This allows you to line up different parts of your song so they have the same ebb and flow as each other, or so they all hit at the same time.
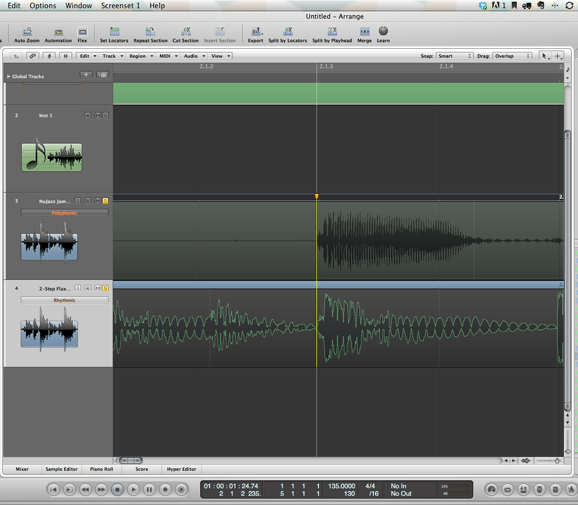
When you place a Flex Marker in a region, simply don’t release the mouse, and move down or up to the region with the transient you want to snap to. In this case (above) I’ve nudged the transient on top, to line-up with the transient on the beat below it. So it’s easier to see, a yellow line extends to the transient you’re attempting to line up to.
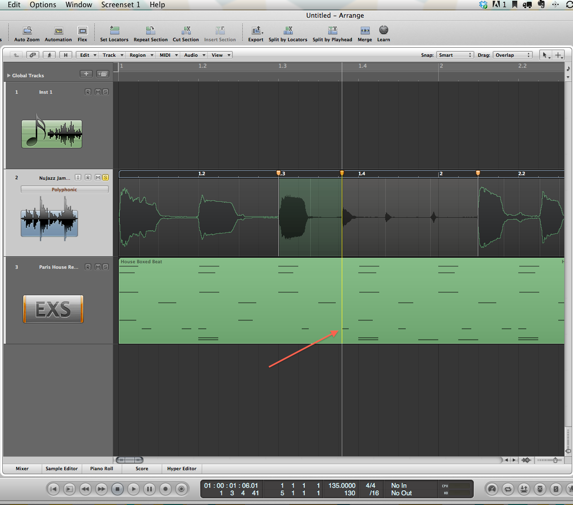
You can also snap to MIDI! You do this in the same exact way as described above, but instead, the yellow line snaps to the note-on or note-off of MIDI notes (see red arrow). Tip: Try nudging transients to the note-off positions for amazing syncopated parts.
blog comments powered by Disqus

