
Control and record tempo changes on the fly
21/09/11 15:49
Speeding up and slowing down the BPM of Logic on the fly can be very useful during a live performance, or while working with other artists in your studio. Today I’m going to show you how to control Logic’s tempo with a MIDI controller, and even record the changes you’ve made.
- First, go to the File Menu and select “Project Settings”, then “Recording.”
- From this window, enable the “Allow Tempo Change Recording” check-box. Because this check-box is located in the Project Settings, you’ll have to enable this for every Logic Project you intend to use this on.
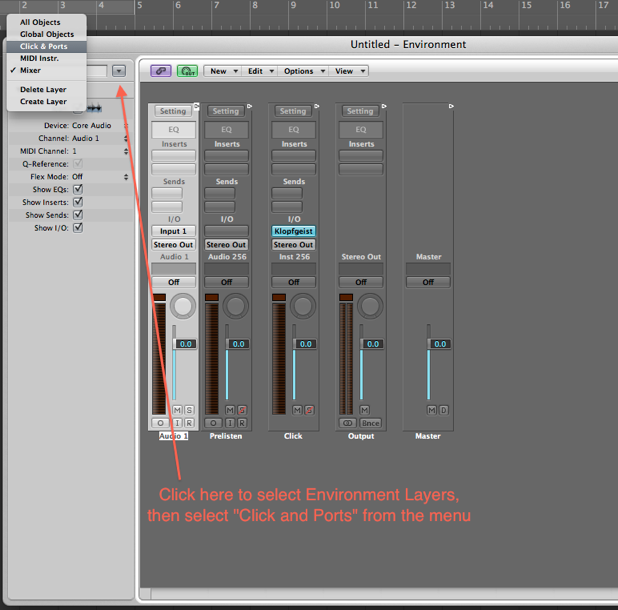
- Next, go to the Environment window (Command-8), and select the “Click & Ports” environment layer (see image below).
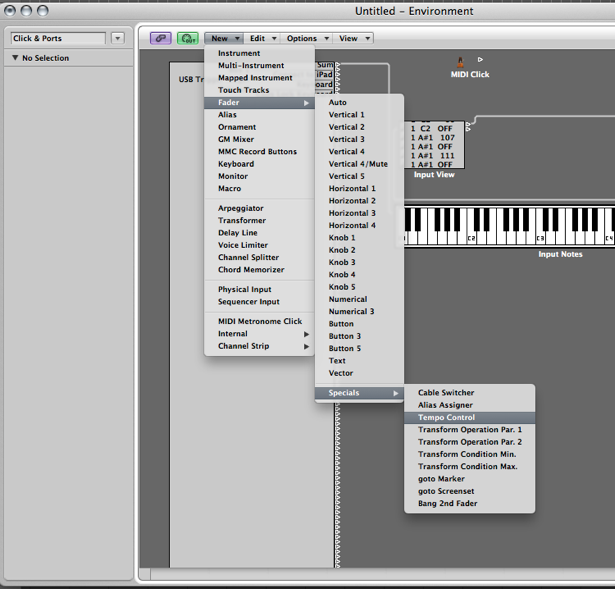
We now need to add the “Tempo Control” environment object. From the Environment’s local menu bar, you can add the object by selecting it here: New: Fader: Specials: Tempo Control (see image below).
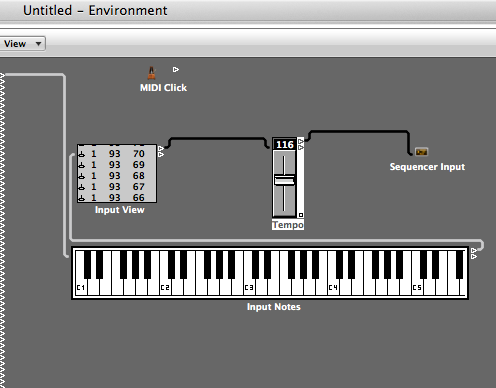
A dialog box will appear saying “To record directly into the sync reference please cable the Tempo fader between Physical Input and Sequencer.” To do this, break the cable from the Input View currently going to the Sequencer Input, and place it into the left side of the Tempo Control...then take the output cable from the Tempo Control and insert it into the Sequencer Input (see image below).
Click the Tempo Control once if it’s not already selected. The panel on on the left side of the Environment window will show you the various options for whatever Environment object you have selected. In the Input field you’ll notice it says “PitchBd” for Pitch Bend. This is the default method to control the Tempo...this doesn’t make sense to me though since the Pitch Bend re-centers itself every time you release the control. If anyone knows why Apple would have chosen this, please mention something in the comments.
It’s easy to change the Tempo Control so it can be used with a knob or slider from your controller instead. Click where it shows the word PitchBd and you’ll be presented with a list of other MIDI options. Choose “Control.” Below it, choose the MIDI channel your keyboard controller is sending on (probably 1), then select the specific CC # the knob/slider is sending. You can see the CC number coming from your MIDI controller by watching the Input View...twist the knob/slide the slider and watch the Input View...the first number is the MIDI Channel, the second is the CC# (what you’re looking for), and the last number is the value. The image above displays “1” as the MIDI channel, “93” as the CC #, and various numbers for the value.
Once your controller is set up, your ready to go. Simply start Logic and move your controller! If you stop Logic then start again, the tempo returns to the last value displayed on the transport (I think this is a bug). In a live situation, this would obviously not be a problem since you’d hopefully not stop in the middle, but if you’re working with artists in your studio, you’ll want to actually record the changes you’re making.
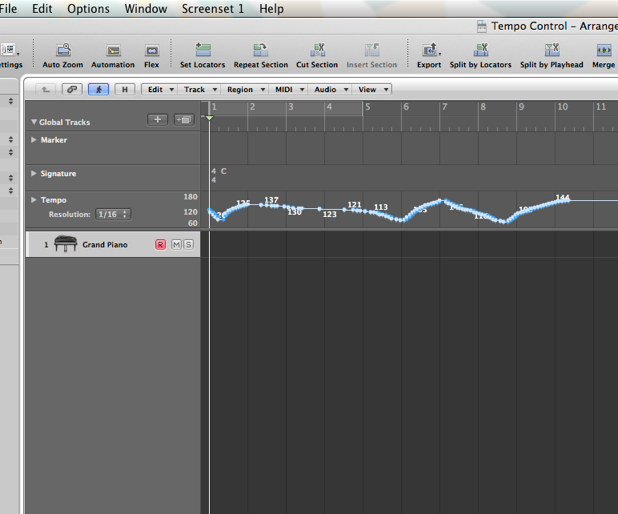
Hit “G” on your keyboard to display the Global Tracks. Create a new track and choose “External MIDI.” Just leave the track at it’s default setting and press the record button on the Transport. When you move the controller you assigned to Tempo Control, it get’s recorded!
Check out the Tempo Global Track...everything you just did will be displayed there. (see image below). Keep in mind that since MIDI CC’s only sends from 0 to 127, your limited to 128 different BPM values. The Tempo Control object starts at 50 BPM to 177 BPM (128 values). This range covers most popular genres of music.
Hope this helps...and if this Isn’t your thing, maybe this will get your more interesting in messing around in the Environment!
blog comments powered by Disqus
Comments
